
Quick overview
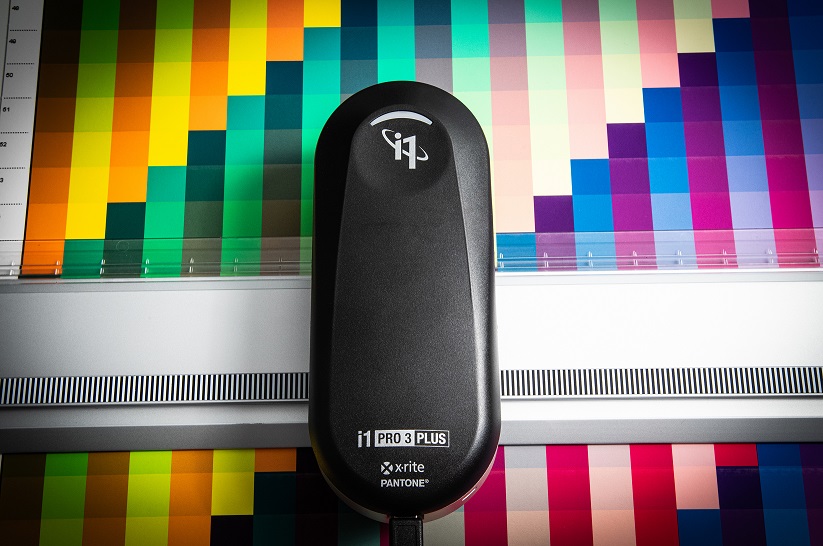
The i1Pro3plus spectrophotometer contains a new LED illuminant that allows for simultaneous M0, M1, M2 measurement in a single pass. The large 8mm aperture (vs the i1Pro2’s 3.5mm) translates into rich, extreme shadow measurements and averaging of uneven surfaces and large dot patterns. Polarized M3 measurements mean smoother shadow tonality and improved deep color saturation on textured surfaces like glossy canvas. Transmissive scanning allows us to measure and profile backlit printing processes with any light table. A longer 23 inch handheld scanning ruler supports large format page sizes and an updated iO3 Table supports the i1Pro3plus for reflective measurement.
Polarized M3 Observations
The M3 measurement condition is a polarized version of M2 excluding UV data and media fluorescence. The sole purpose of polarization is to eliminate the reflections on textured glossy surfaces that can lead to poor measurements in other conditions.
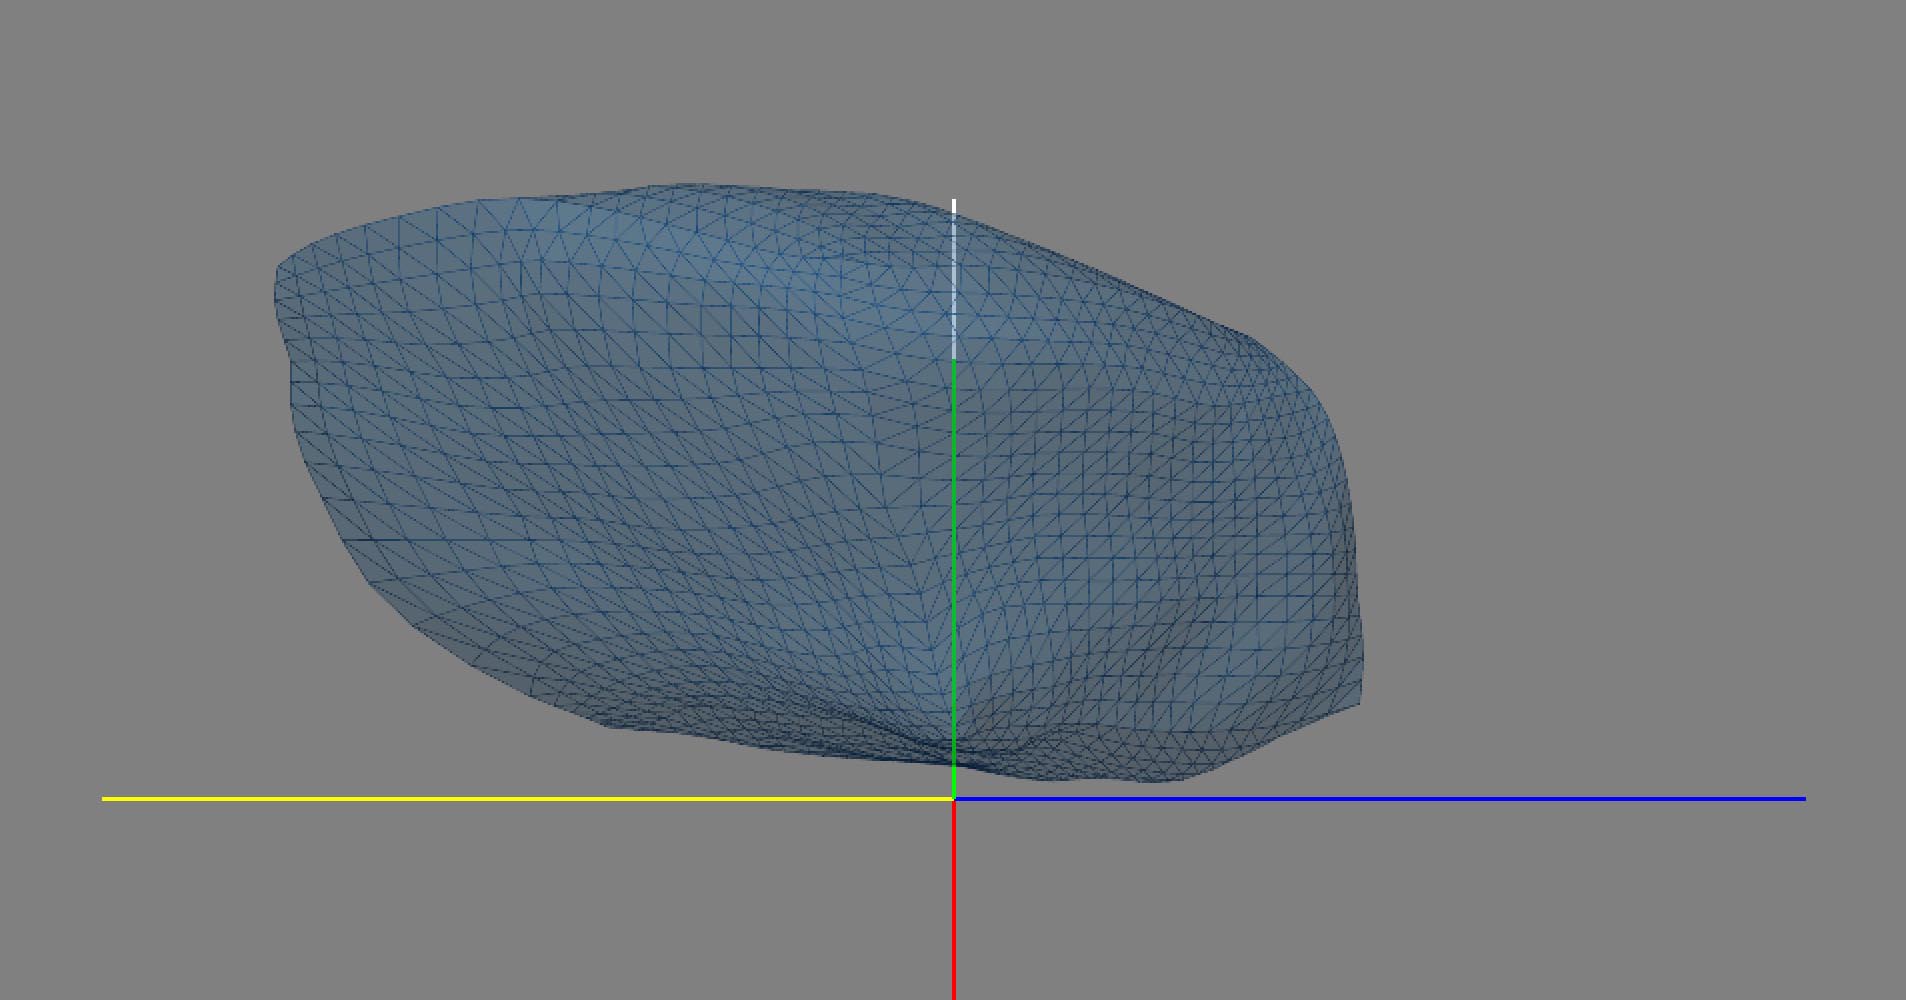
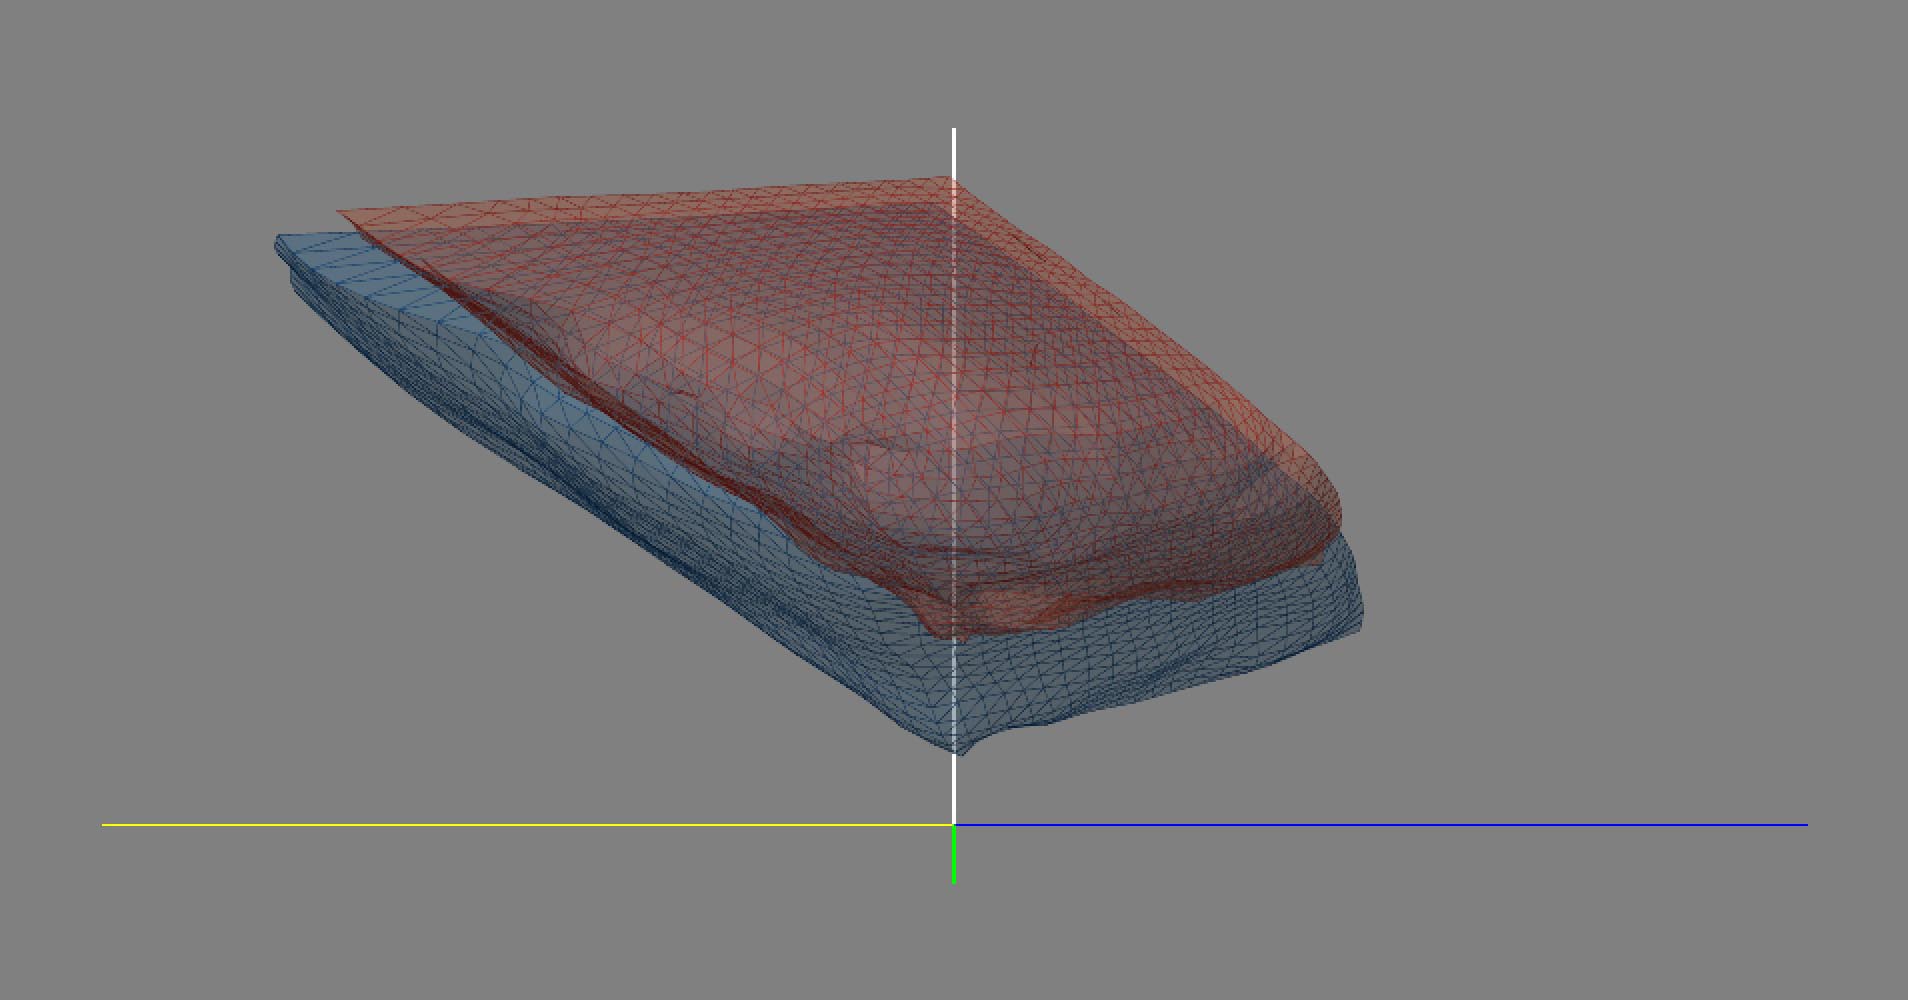
Let’s look at and compare M2 and M3 measurements of the same Breathing Color Crystaline Glossy canvas. i1Pro2/iSis M2 measurements are shown in red while the i1Pro3plus M3 measurements are show in blue. You can see that the bottom half of the M2 red gamut “rock” is quite bumpy whereas the polarized M3 blue gamut rock is perfectly smooth.

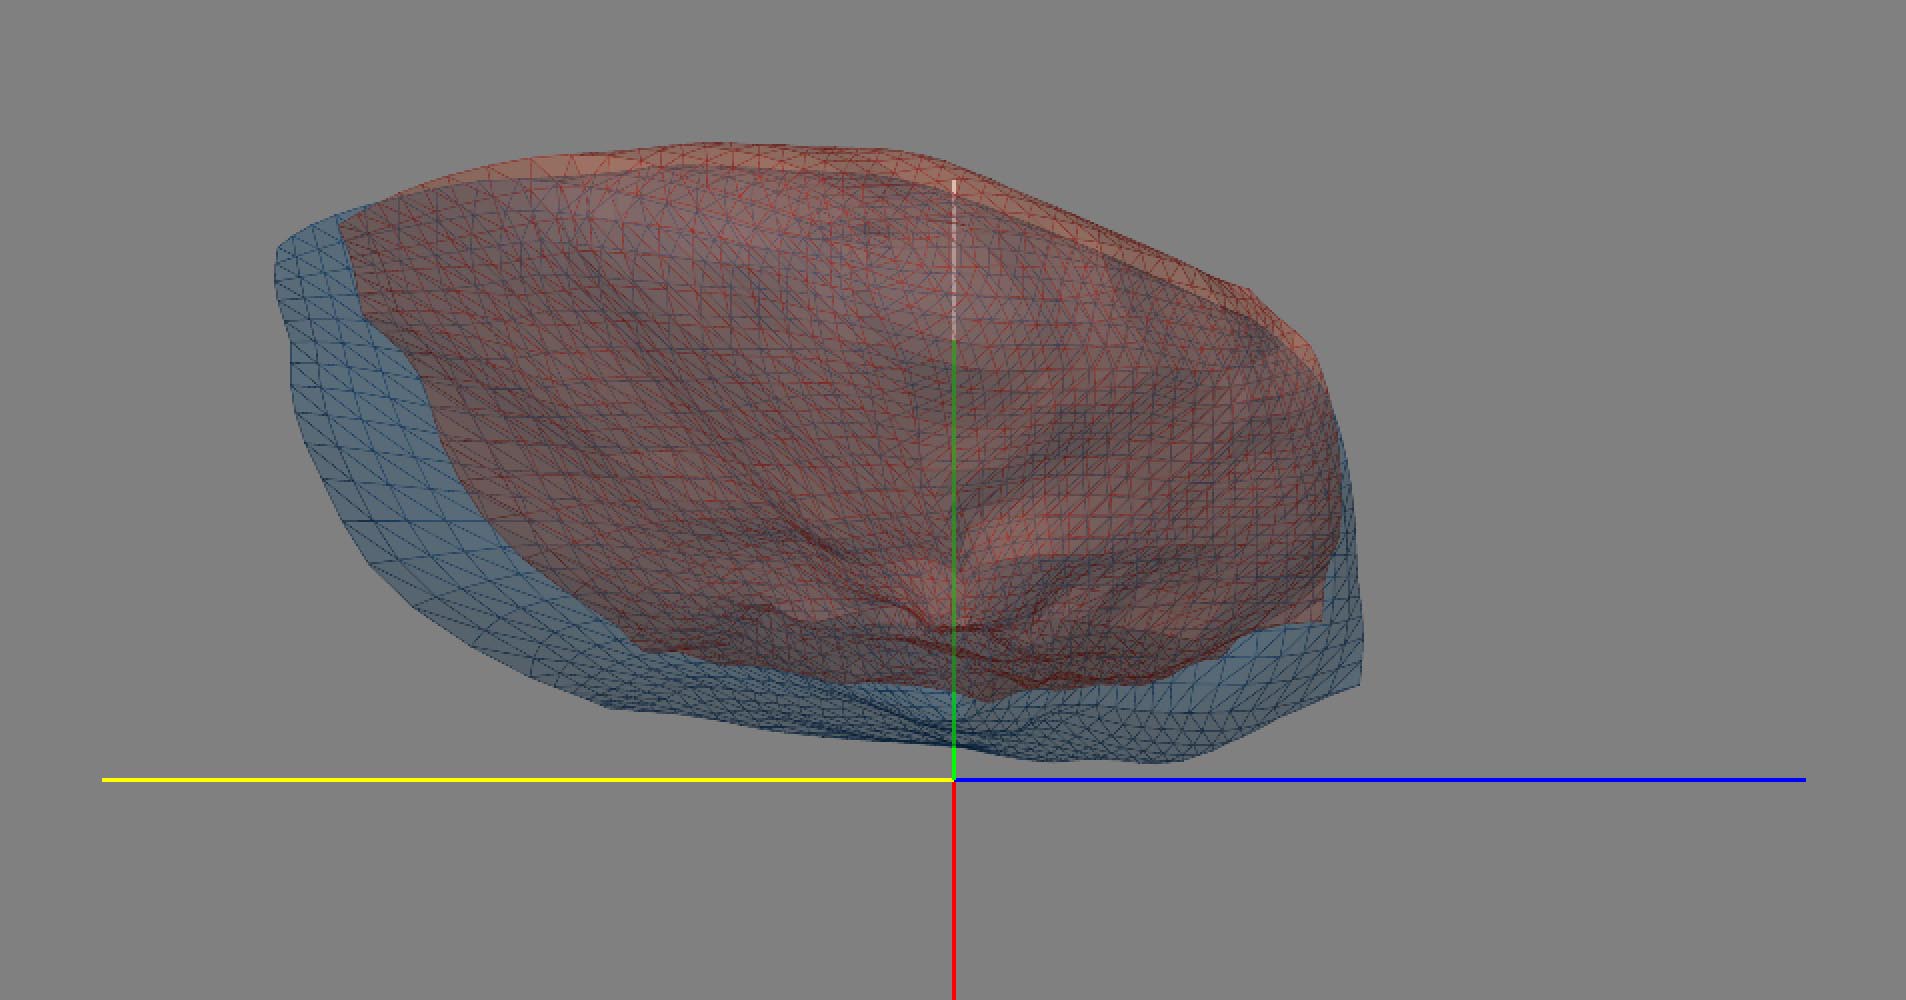
The size of these rocks are quite different, but don’t let that fool you. It is a common misconception that color gamut renderings represent the size and volume of a process’s color gamut. Color gamut renderings visualize measurement data – which you might say is how a spectrophotometer “sees” a process. Two spectrophotometers might “see” the same printing process differently. Or in this case, the same spectrophotometer “sees” the same process differently in two different measurements conditions. The polarizer acts as a type of neutral density filter, making all the measurements from the paper white to the black point darker. This is illustrated in this composite M2 vs M3 color gamut rendering:
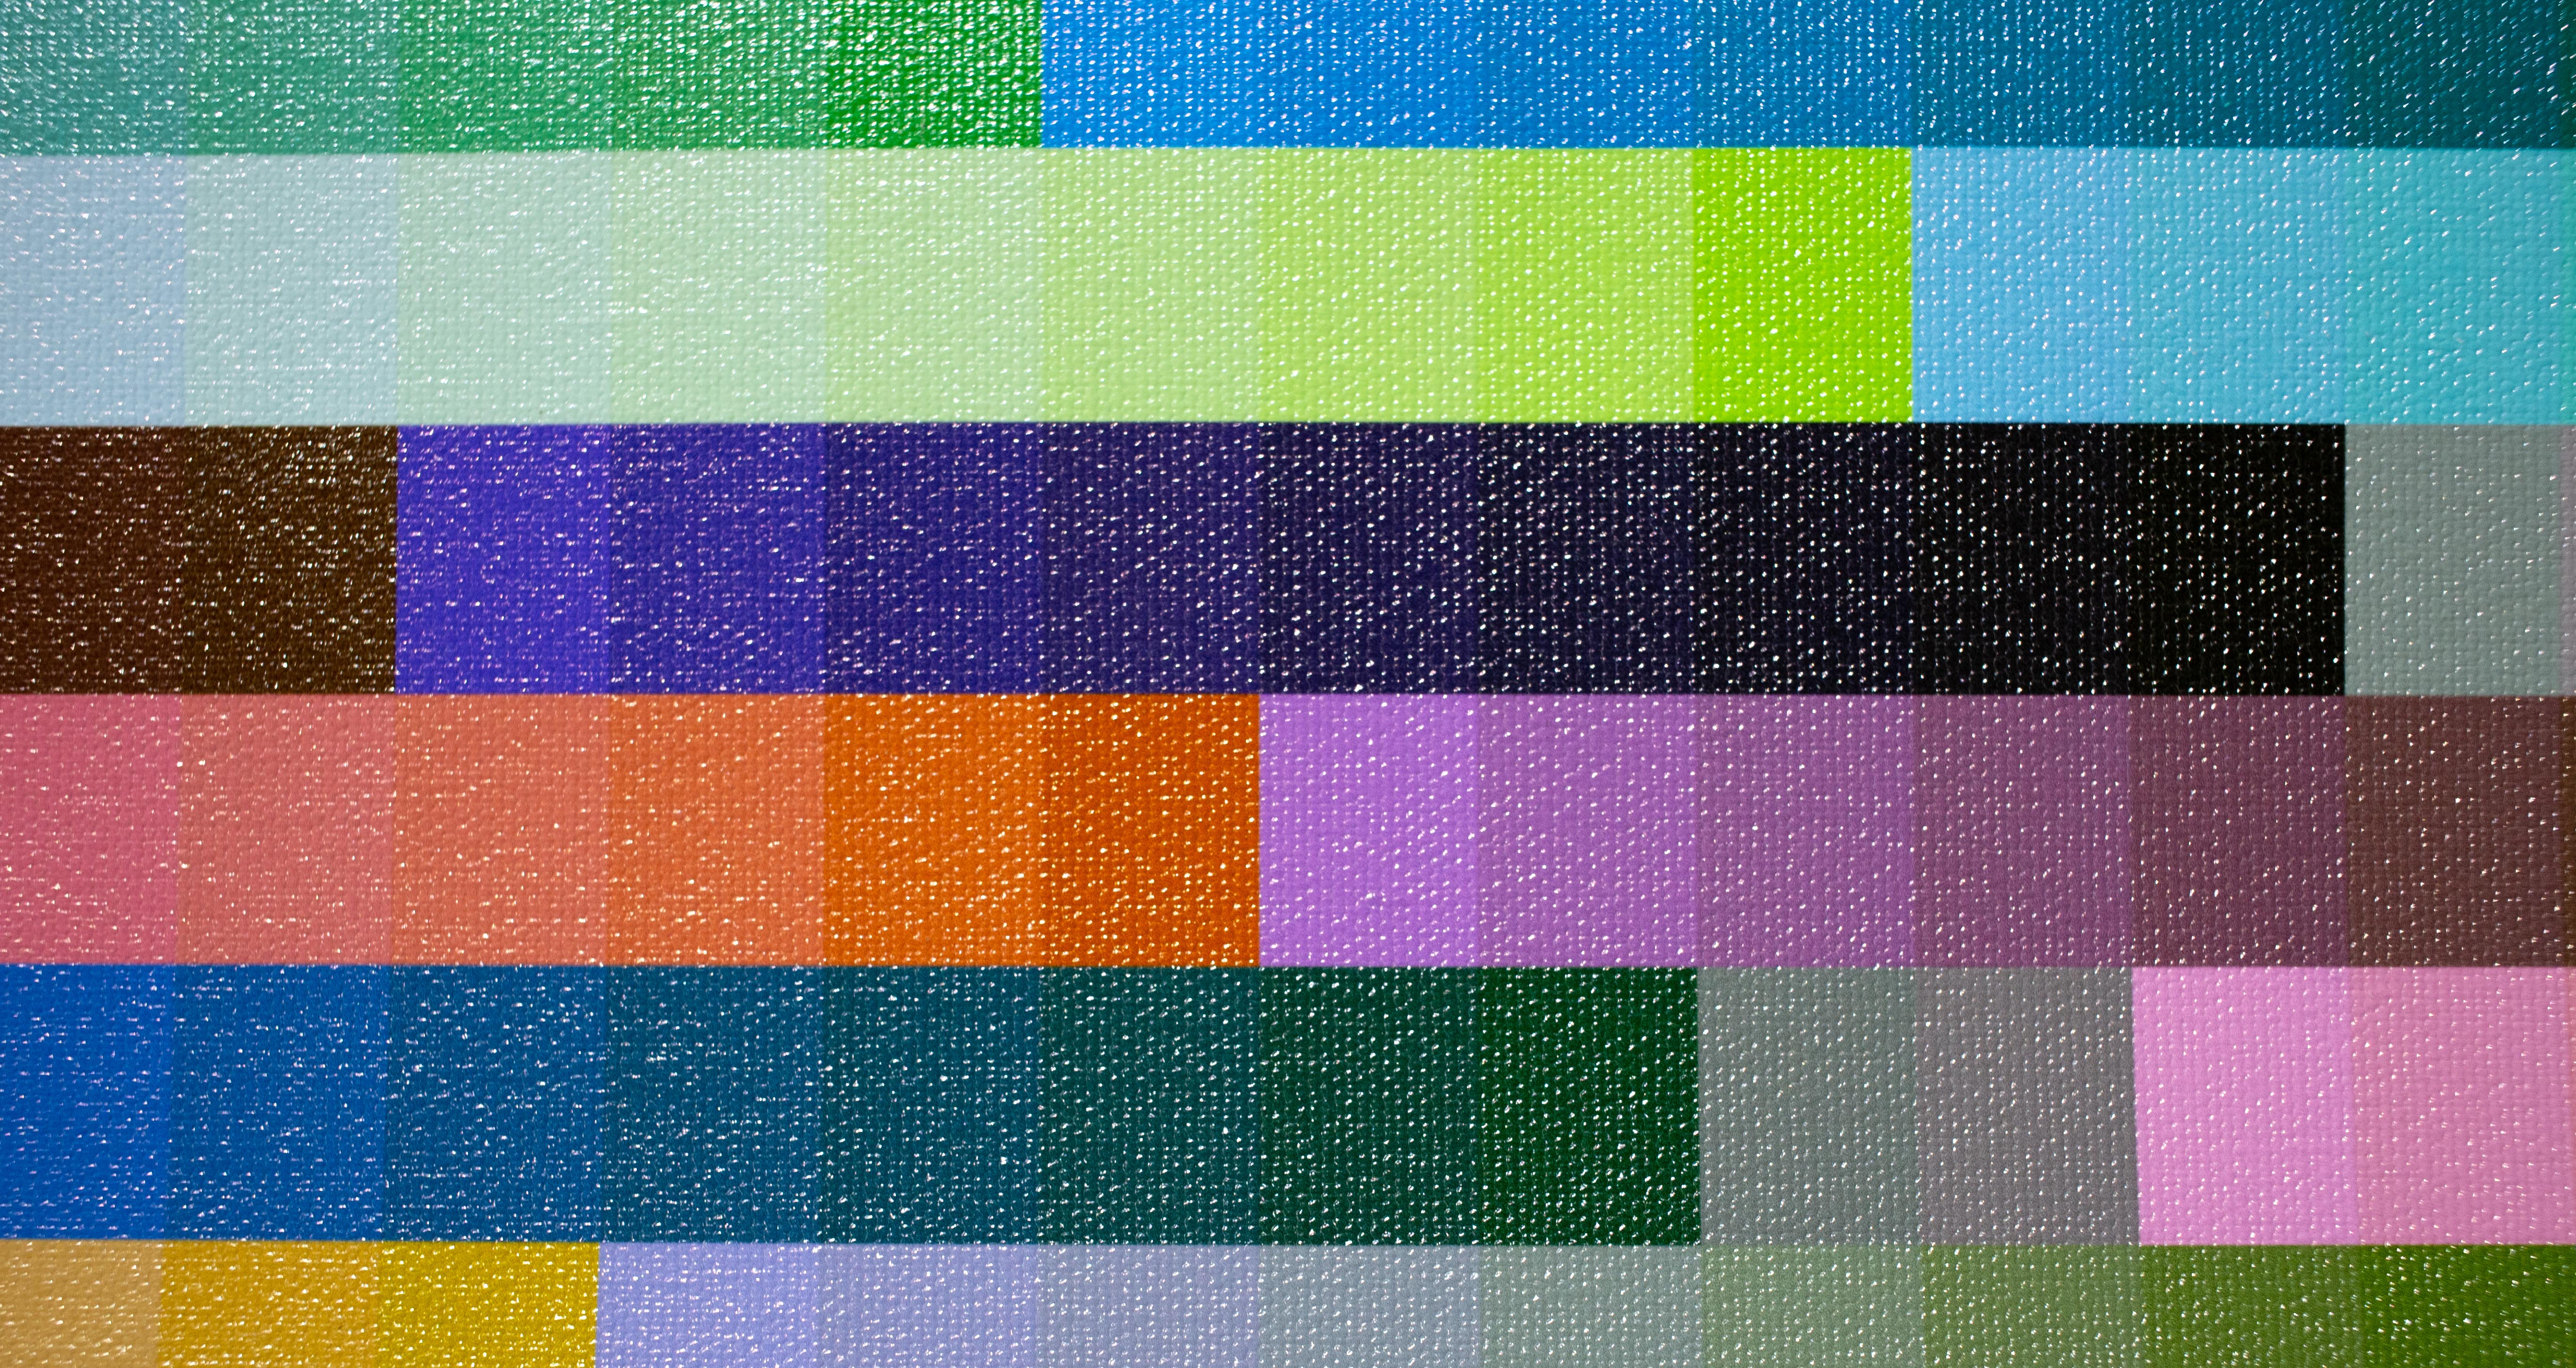
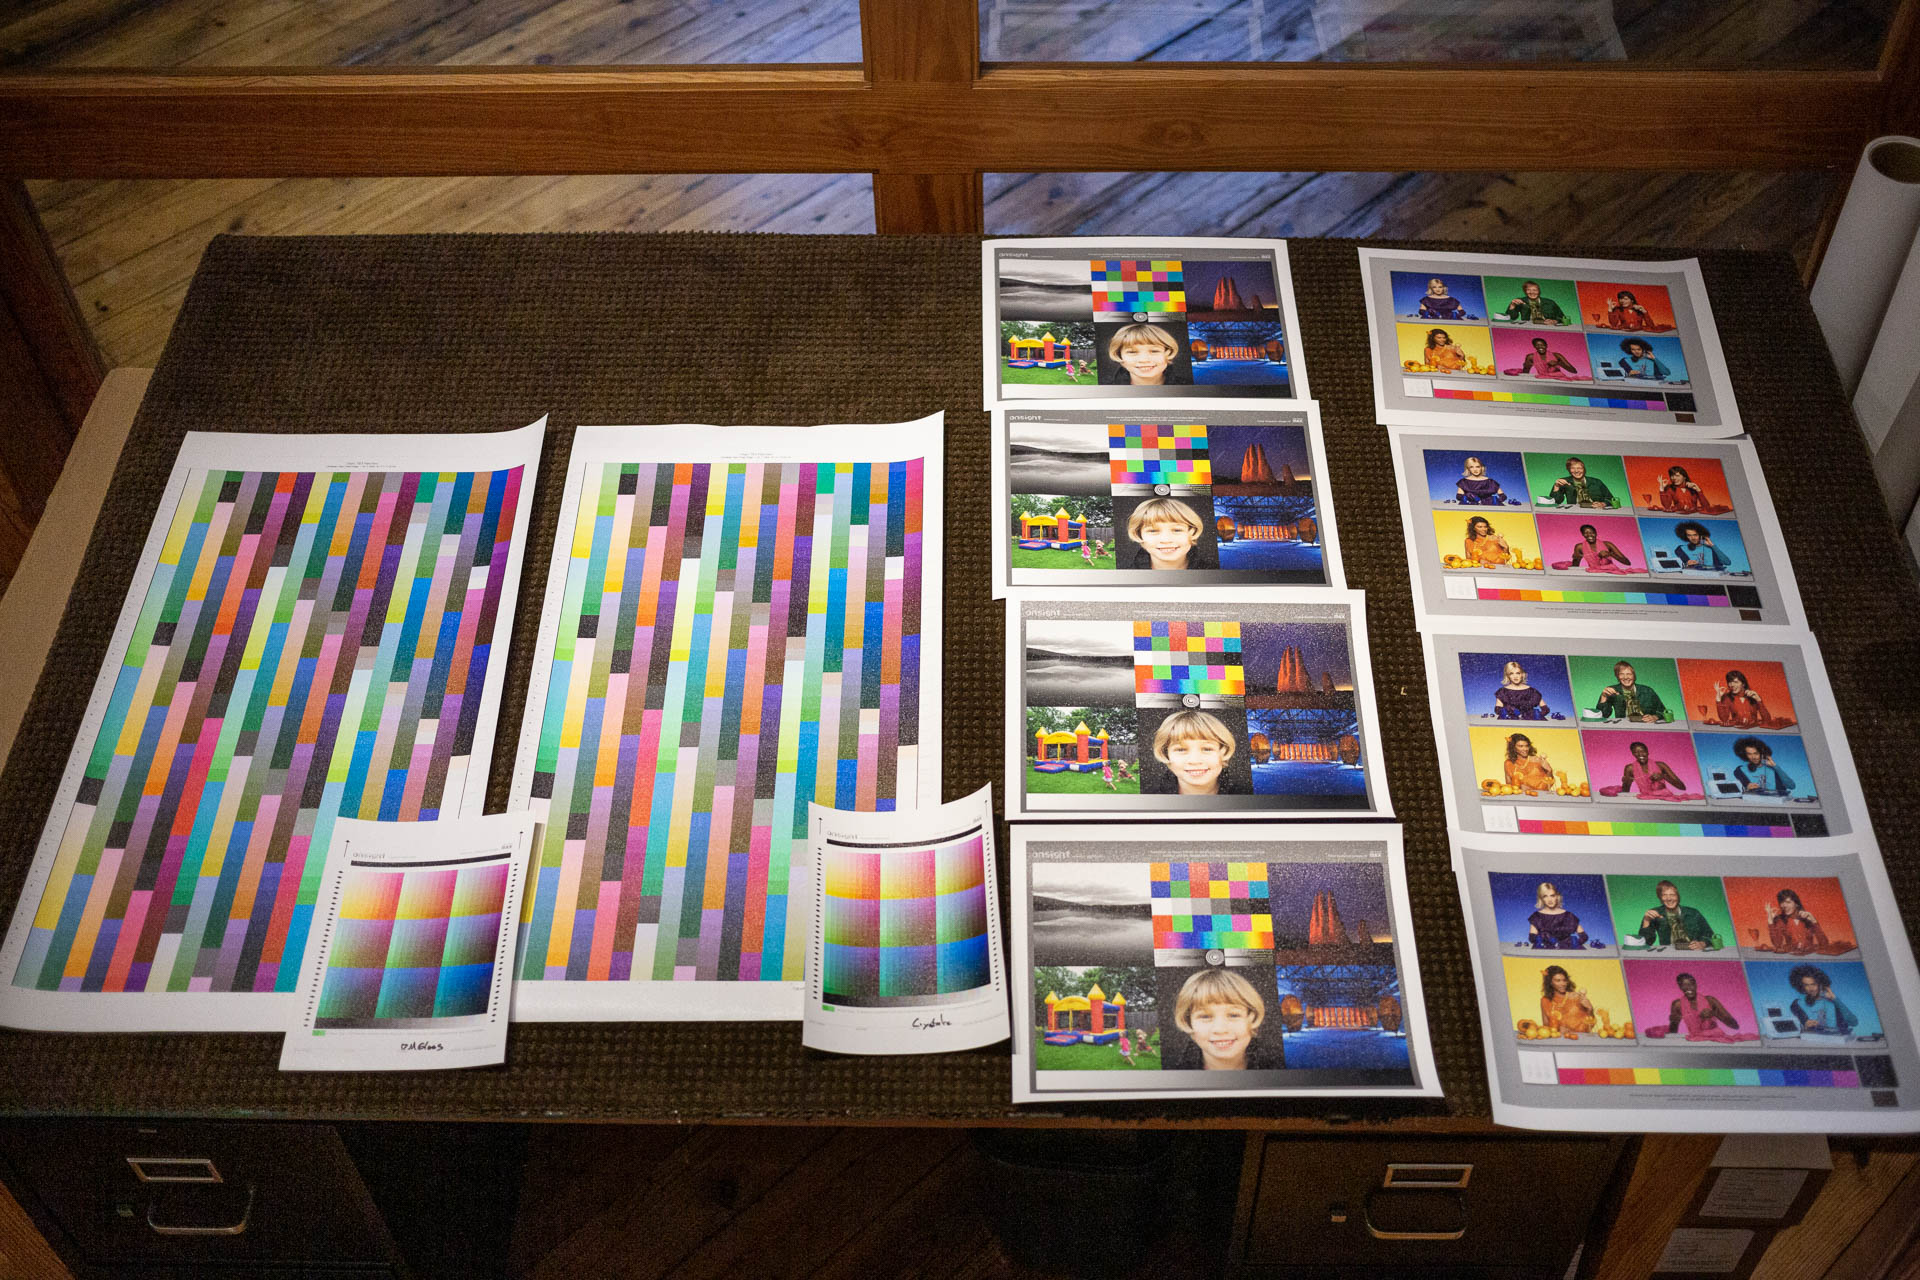
This does not mean that the final process will have a darker paper white, richer black or larger color gamut. Regardless of how the spectrophotometer “sees” it in these different modes, the printing process has a fixed white, a fixed black point and fixed color gamut. In order to make statements about final print quality one must make prints with the profiles and evaluate those prints, both visually and colorimetricially with measurements. When we do this, we find that the paper white, DMax, and color gamut are the same between these two profiles, despite how the color renderings looked. What’s different is improved smoothness and saturation in the shadows. Deep rich blues especially benefit from polarized measurements. My evaluation image illustrates these differences in these circled areas:

You can download this evaluation image from the downloads page and here are the actual M2 and M3 profiles illustrated above. I hope these profiles, renderings and dialog do a better job at illustrating the print quality differences one can expect to see than photos on a website. Ultimately one needs to see it for themself in person, and in print.
In the past, M3 measurements were a wild card with results that were somewhat subjective. XRite has now made M3 a reliable workflow option with the same high quality results we’re used to seeing from i1Profiler. The final print results from M3 profiles are very similar to what we are used to seeing with M2 measurements, but have some modest, welcome improvements that a well trained eye might appreciate. We’ve seen polarized measurements before but the i1Pro3plus and i1Profiler v3 together really make this measurement condition an easy possibility for production workflows.
Transmissive Observations
In the “real world” I find most production professionals are at a loss as to how to calibrate and profile their transmissive offerings. A small percentage of them are using an ancient Spectrolino or Barbeiri LFP for transmissive measurement and struggle to translate these measurements into the RIP or profiling software for meaningful print quality improvements. From my experience, most production professionals are using a reflective profile with a manually created density curve for their backlit products. Either of these approaches have produced “good enough” results in a world lacking a better alternative. The i1Pro3plus changes that and represents a huge step forward in transmissive measurement, calibration and profiling. i1Profiler v3 introduces brilliant new color science that translates into meaningful print quality improvements that have to be seen to be believed. I’m not easily impressed but I’m blown away by how much better backlit print products look and am excited to show this to my clients.
i1Profiler 3 adds several new steps to transmissive profiling that we haven’t seen before.
To start, XRite has a brilliant approach to supporting any light table for the measurement process. A template is printed and taped to the light table of your choice (I recommend a 13×19). The bare light table is measured with the i1Pro3plus before a 100 patch profiling target is printed and taped onto this template and measured as well.
Because light tables are often unevenly lit, i1Pro3plus measures the whole grid on the bare light table, defining the qualities fo each measurement position. Next, i1Profiler uses a unique 100 patch target which fits nicely on a single 13×19″ sheet. When the profiling target is measured within the template, the measurements are referenced to the bare lighttable measurements so that lighting inconsistencies are compensated for.
A second profiling target is then generated and measured. Both the front and back side of the media is measured. You can even measure both the lightbox used to measure the targets, but also the final viewing lightbox and customize the profile for the final presentation. This final point is really notable because eases the process of creating profiles locally while still being able to incorporate measurements from customers final viewing boxes remotely. i1Profiler has separate workflows for Clear, Translucent and Fabric media.
All-in-all transmissive profiling has a bit more steps and measurements than reflective profiling. XRite is incorporating into new color science that we haven’t seen before and the final results are worth the effort. The end result can have significantly improved saturation, Dmax and gray axis neutrality.
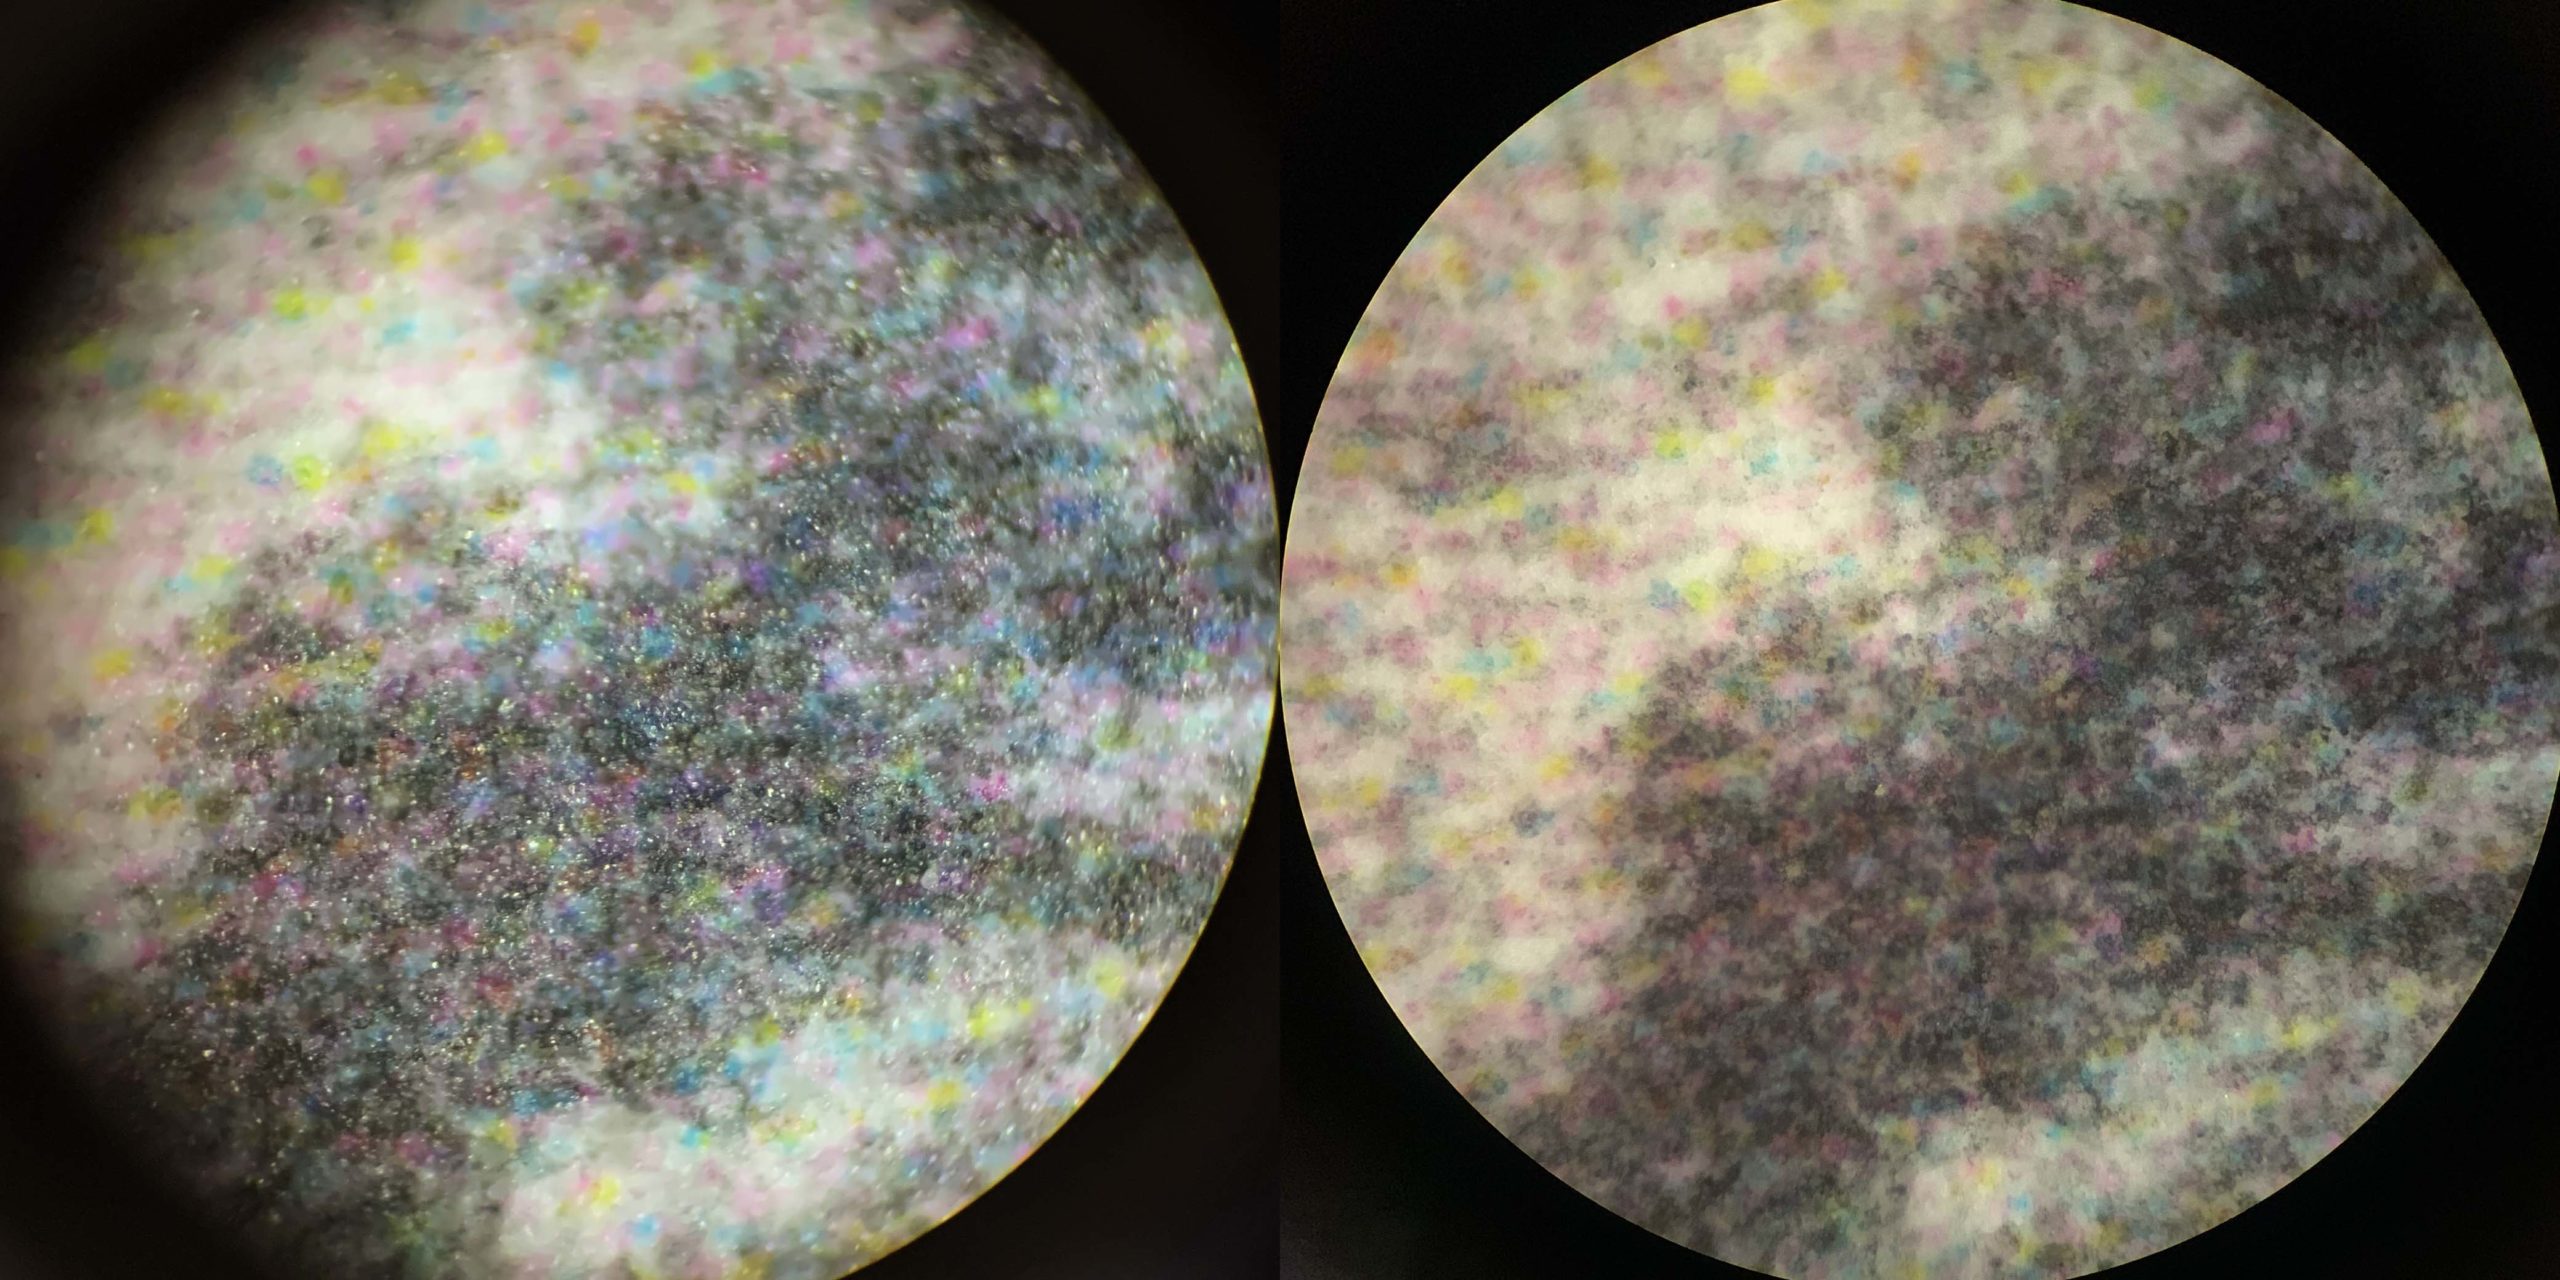
Here is a quick final print quality comparison for a popular backlight film product. On the left is an evaluation image printed with a reflective profile and on the right, a transmissive profile.
i1Pro2 and i1Pro3plus Comparisons
I have been using the i1Pro3plus both in my own printmaking studio and traveling to see clients for 6 months now, and have found it to be as steady and reliable as the i1Pro2. For demanding users, the i1Pro3plus’s improved lighting design translates into better repeatability than the i1Pro2 and better correlation with high end devices like the eXact. The i1Pro3plus’s large aperture also translates into targets with larger patches. Spot versus scanning, scanning with the i1iO3 or the zebra ruler, and the various measurement conditions all call for different minimum patch sizes which is a little confusing at first. While spot measurements can be made from the smallest 14x14mm minimum patch size for example, reflective targets are 16x16mm for M0/M1/M2 scanning with the ruler and the i1iO3 Table, 16x20mm for M3 scanning while transmissive profiling targets have the largest 16x40mm minimum patch size. There is no older i1Pro compatibility mode and it cannot read existing targets that are formatted for older i1Pro devices. This the price one must pay for high quality, large aperture, polarized and transmissive measurements!
The i1Pro3plus is not a replacement for the i1Pro2 – they are different devices each with their own unique strengths. The i1Pro2 is the worlds best selling handheld spectro that enjoys incredible support in nearly RIP and color measurement software available today. The i1Pro2 hits a value “sweet spot” performing what most people need from a spectrophotometer at an affordable price. The i1Pro3plus expands upon the i1Pro2’s capabilities for users with more specialized and demanding needs. I imagine pro users will want to own both of these devices, using each for different tasks.
i1iO3 Table
Instead of just adding a new cradle, XRIte thought now was the time to reengineer the arm with new metal mechanicals for increased precision, repeatability and reliability. ON the outside the i1iO3 table looks like the same as the black i1iO2 table but has a different cradle that supports all three generations of i1Pro devices. Since the i1Pro3plus requires larger patches and more pages of patches I’ve come to really like using the i1iO3 table with the i1Pro3plus. I daydream about making a thin lightbox I could use with the i1iO3 table for transmissive profiling. Otherwise, the i1iO3 table works as one would expect without any surprises.
Pricing and Availability
| Part. No. | Description | MSRP (USD) |
| EO3PLBAS | i1Basic Pro 3 Plus | $1,699.00 |
| EO3PLPHO | i1Photo Pro 3 Plus | $2,199.00 |
| EO3PLPUB | i1Publish Pro 3 Plus | $2,999.00 |
| EO3AST | i1iO3 for i1Pro 3 Plus | $2,995.00 |
The i1Pro 3plus and upgraded i1iO3 table are shipping today. Since the mechanical differences are substantial, existing i1iO tables are not directly compatible with the i1Pro 3plus and can not be upgraded. XRite’s i1iO3 table trade-up program will be announced soon.
i1Profiler
XRIte has a full time team working on i1Profiler. i1Profiler has gone from version 1.8.x to 3.x not only because this is the biggest update i1Profiler has ever seen, but also to be in line with the “3” part of the i1Pro3plus. i1Profiler 1.8.x will not auto update to 3.x until some compatibility issues are resolved with i1Pro1 devices. i1Profiler 3.1.1 and up are 64 bit compatible, MacOS 10.15 Catalina and Windows 10 ready, etc.
Summary
The i1Pro3plus completes XRite’s i1 product family by providing polarized, transmissive and large aperture measurements. i1Profiler has been upgraded with new color science, profiling workflows and graphics to support these new capabilities. The large aperture is particularly well suited for the growing textiles market and other materials that have a pronounced texture. The polarized M3 option allows for better measurements on textured glossy media. XRite has completely re-engineered transmissive profiling bringing impressive print quality improvements. As it’s difficult to illustrate the print quality differences one can expect to see here on a website, I’d encourage you to get some hands’ on to see these differences for yourself.
I have found switching between the i1Pro2, i1Pro3plus, iSis2XL and i1iO3 table to be seemless. With XRite’s XRGA standard working behind the scenes, final print quality is astonishingly consistent across all of these devices. What this means is that large shops can profile different processes with different devices and produce prints that are visually consistent with each other. With the current lineup of i1 spectrophotometers, XRite addresses a huge variety of users and their various needs at a compelling price point.
Disclosure
Yes, Onsight is a long term tester for XRite and many other companies, and does receive evaluation units from time to time. Onsight does not accept monetary compensation for testing or reviews, nor sponsorships from anyone. Maintaining independence and objectivity in all pursuits is a primary objective. Onsight reserves the right to compliment and/or criticize when appropriate. This review is by no means comprehensive as there are many additional details to discuss. We hope you’ll find this a brief but meaningful 3rd party evaluation. Thanks and let me know if you’d like to discuss this further in the comments below.
XRite’s Press Release:
https://www.xrite.com/about-us/news-events/press-releases/xrite-announces-i1pro-3-plus-color-profiling-device-for-imaging-print-and-textiles
Update 10-3-19
Information about the i1iO3 table and trade-up program added. Added a comment about the repeatability and correlation to other devices. i1Profiler 3.1.1 offers improvements to transmissive scanning, a fix for metallic paper profiling and improvements to the “Neutralize Gray” slider in the perceptual rendering options.
Update 4-4-22
I’ve enjoyed using the i1Pro3plus for a few years now, have profiled a ton of canvas medias with it, but just discovered another hidden benefit I’d like to share. For those super picky printmakers working with matte surface papers, printing in color mode (as opposed to Advanced B&W mode, or piezography inks) with common M0/M1/M2 ICC profiles can lead to a slight color cast that is disappointing. My discovery this week is that M3 polarized profiles improve the gray axis neutrality to the extent that picky printmakers can be happy printing B&W images in color mode on these papers.
I am at the point where I’m ready to start making all profiles in M3 mode, but frustrated that the iSis lacks this functionality.
Update 6-8-22
Polarized is surprisingly helpful for dye sublimation processes. Some amount of glare is everywhere and polarization eliminates it. The results are clearly better without glare. Quality measurements, not quantity! 100% of the measurements I’m making are now polarized.
As a side note, camera or scanner based art documentation also benefits greatly from polarization, as seen with these with and without polarization samples. I’m a polarization proponent, as mastering your work clearly requires polarization.
Update 4-20-24
Polarized measurement are the bomb. They contain so must less glare and less specular highlights. Cotton Rag papers are interesting because the black patches look so light to the eye under unpolarized light and yet measure (and capture) with polarization far far darker. We used too think that polarization wouldn’t be beneficial to matte surface papers but I’m finding it to be remarkably beneficial. “But there’s no specular highlights to remove” you might say. Well, when we look at these papers under a microscope we can actually see specular highlights on each and every cotton fiber!
Polarized measurements are cleaner, and cleaner measurements translates into better results, even with far fewer patches.
As always, let me know if you’d like to see some sample prints demonstrating these print quality differences or if you’d like to test it together at your location. – Scott Martin
Hi Scott,
Thank you for your helpful articles, they have been a great reference for color profiling and printer reviews from the past.
I am moving from an iSis that I’ve used for a very long time to the i1Pro 3 Plus with perhaps the i1io Table, but maybe don’t need that. Previously I’ve used large patch size sets of around 2900 patches as I could easily print two sheets and be done with it. With the much larger patch size needed for the m3 measurements, could you point me towards a patch size set that would be a good place to start with an optimization made thereafter? I think you prefer smaller size sets now with the m3 measurements. Hoping to cut down on the number of sheets needed. I read somewhere else that you prefer smaller size sets now with m3 I think. Thanks!
Hi John. Yes, we need to unlearn the “More patches are better” approach that we grew up on and embrace the idea that “a fewer number of well-placed, clean patches is better than lots of poorly placed patches measured with glare” and find the *sweet spot* patchset that allows us to get optimal results with less work. i1Profiler’s Patch Generator is great about optimizing the *placement* of patches and M3 mode gives us cleaner measurements without glare. The combination of the two is quite powerful and 290-500 patches can produce as good or sometimes even better(!) results than more patches! There’s more to say here (smoothing, dark weighting, linearization, etc) but I’ll leave it at that for now. I’d probably encourage you to skip the iO and focus on larger tabloid-sized targets that you can read in strips at one time with fewer pages. Cheers.
Thank you Scott, brave new world to step into with small patch sets but the fewer pages needed will be a relief. Looking forward to seeing how this turns out.
Yes exactly. Keep an open mind, do some exhaustive testing, and let the results speak for themselves. I think you’ll be delighted by reduced workload and increased image quality. Contact me via email if you want to get into the weeds with this.
Hello, Scott!
As I can understand, difference between i1Pro3 and i1Pro3Plus is aperture size. My question – is I13Plus support both (3.5 and 8) or only 8mm? I like long ruler from Plus version, but I also need small aperture. Thanks!
The difference is not just aperture size, the i1Pro3plus adds the ability to use a polarization filter and make transmissive profiles. The Plus uses a fixed aperture that allows for more light which these additional features require. FWIW, I initially thought I ‘needed’ a small aperture for most work but have completely switched to the plus for 100% of the work I’m doing now. The *quality* of the measurements is better and therefore less *quantity* of patches is needed. Also slight imperfections in patches aren’t a deal breaker. Get both if you like but I’m personally surprised at how little I use my i1Pro3 standard aperture anymore, and I’ve completely given up on my iSis. The M3 measurements on the i1Pro3plus are just so good I can’t deal with anything less.
Thank you Scott.
Regarding your update (4-4-22). Using M3 for profiles on Matte paper to get better neutrals in a color print pipeline. I tried what you suggested, with Epson premium luster paper. And yes, those neutrals have improved compared with what I am used to (M2). I’ll definitely be using that in future. Thanks for sharing. It would not have occurred to me to try M3 with normal media without your suggestion.
Do you have any theories as to why the M3 readings would result in better neutrals in the print?
Hey Peter. In short, glare is the enemy. Anyone who’s done a lot of high res art documentation work knows how hard it is to completely remove glare and reflections from surfaces. If we know how and what to look for, we find some amount of glare everywhere, even on matte surfaces. Look at these with and without polarization comparisons: https://www.on-sight.com/polarization-samples/ and image how this applies to spectro measurement. Polarization is truly the key to eliminating glare in camera, in scanner and in spectrophotometer. The benefits are easy to overlook or pass off as unneeded but, if you’re picky, you really want it 100% of the time. For what you’re doing right now, the problem hasn’t been been with the number of patches but rather, the quality of the measurements.
I am printing an upcoming show of very low key images, that the photographer wants printed on matte paper. From my experience, I didn’t think that particular combination was going to end well. This morning I printed one of their images on both the M3 and the M2 profiled Epson Enhanced Matte as a comparison. The M2 profiled Matte print is un-showable. As I expected. Those shadows are what I would describe as "road kill". But the M3 profiled matte print is looking great. In ways I didn’t expect. I am soo…. happy! The photographers and technicians I have shown the test prints too so far, are blown away by the difference. They are excited too.
I always thought the 45/0 geometry of the spectros was meant to deal with the flare issue when reading ‘normal’ media. And I never thought to question / test that assumption. I am going to move to M3 profiling as our new standard for our printer environments. I’m currently reading M3 patches by hand. But I will need to look into some automation going forward.
Thanks again for sharing you knowledge.
Regards
Peter
Glad you agree Peter. Polarization is truly the bomb! Automation forthcoming.
We have several i1Pros v1 and v2, and a license for i1Profiler. To use the i1Pro3, do you need to buy the new v3.xx i1Pofiler, or will the existing license work for v3.xx?
All i1Profiler licenses are transferable. i1Profiler has this capability under the “transfer License” button at the home screen. You’ll be able to transfer any licenses you have from any i1Pro device to any other. Cheers.
Dear Scott,
I just got the i1pro3+ from Xrite for testing use. But I am having a problem with the M3 measurement. I use 1105 patches, printed on Hahnemuhle Metallic Rag paper, after the scanning part with the polarizer, I couldn’t generate a profile, it got stuck in 56% for a long time. I then export the measurement to CGATS and imported it into ProfileMaker 5 which has no problem at all. I have contacted XRITE China and their staff has the same problem as well. Wondering if you have had this kind of problem before. I’m using i1P v3.1.1.
Thanks
Hey Aaron! Love your work. I was in Shanghai recently – I should look you up next time I’m there.
Yes, there is a known issue with Metallic paper profiling. The white patch needs to be the lightest patch of them all but the inked up solid yellow patch often comes out slightly lighter, which throws i1Profiler off. Save your measurements as a CGATs file, study these two patches and lighten the white patch manually as needed. That will get it to work and the results will be perfect. I’ve been doing this for years. Should be addressed in a software update soon.
As of April 21 2020, it is still stuck at 56% when profiling HM Metallic. What translucent film you are using? One of the Pictorico?
OK so you’re mentioning two things here:
1) Metallic profiling. How do you measurement look? Since they fixed the white patch luminance issue, I’ve been able to profile HM Metallic without modifying the measurements. Tell me more so I can help diagnose. Email me some measurements.
2) Translucent media. I’ve used a good bit. Sihl, Inkpress, Pictorico and a bunch on UV curable machines I wouldn’t know the brand of. For aqueous printers, Sihl, Inkpress, Pictorico are the three main brands to consider. Its hard to pick a favorite here – depends on your application. That said, Sihl 3989 WindowGraphx Backlit Film with EasyTack is pretty neat unusual stuff.
>>i1Profiler 3.2 and up are 64 bit compatible, MacOS 10.15 Catalina and Windows 10 ready, etc.<<
Any idea about the licensing though the HASP dongles which I thought were all 32 bit? I've got the latest version of i1P and indeed it's 64-bit but I'm worried after an upgrade to the new OS, I'll lose my licensing. The updated software didn't seem to provide a 64-bit HASP driver.
Hey Andrew! Yes, I’m in the same boat and share your concern. I have 3 dongles (dedicated for home/studio/road) and need them to work. 3.1.1 is all 64 bit including the HASP dongle driver. The 3.1.1 release notes say “Adds new Hasp dongle driver with 64â€bit support (macOS).” I find it interesting the the dongle driver is unchecked by default in the installer but one can check it…
I’m not moving to Catalina anytime soon. Like yourself I have a jagillion old and not so old color utilities that I’m not ready to let go of quite yet. I’m looking at you Upton! :-p
Also, the build I thought would be released as 3.2 was released as 3.1.1. Sorry for the confusion there.
Is it no longer possible to print profiling patches on 8.5″x11″ paper? Just wondering what kind of a difference in print quality I might expect (if any) using an Epson 7890 and mostly matte paper types for both color and B&W. I wonder if it would be worth the money and effort to replace my older i1Pro with this new one. I guess that’s always the question, eh? And are they still touting it for display profiling too? Then there’s always the problem of what to do with the old i1Pro. Be nice if they had a recycle program.
Hey David! There’s always a market for used i1Pros on eBay and at similar places. But I don’t think you’d see much difference on that type of paper. Yes you can print profiling target on 8.5×11 papers! I have an 8×10 target for that reason. If you’re doing a lower volume of profiling you can always consider remote profiling. I, for one, love your work and know someone that might like to trade. Cheers!
Hey Scott, thanks so much for the reply. Now that Epson has announced the new P7570 and P9570 printers, maybe its time to upgrade everything. Some nice features like no more Pk-Mk ink switching. Of course then I would have to figure out what to do with the 7890 that I have. Hey, I’m always open for trading. Regards.
Hey David! Yes, I’m pretty excited about the P9570 and saying goodbye to black ink switching.
ColorThank you very much for sharing your experience with the i1Pro3. The use of a polaring filter has been around for a while but we have to thank X-Rite for including it as part of a complete approach to color management on difficult media.
Hey Roger. Yes, a lot of these technologies have been around for a while but XRite really brings it all together in a nice, modern, easy to use package. For a lot of us, that allows us to get back to using polarized, large aperture and transmissive measurements, which is refreshing.